
Weather-stripping is a type of insulation installed around doors, windows, and other openings to prevent drafts and noise and increase your home’s thermal efficiency. In addition, you can install weather stripping on your sliding patio screen door to prevent insects from entering your home while adding style to your home’s exterior. (Below) in this article, you’ll find the three most common types of weather stripping and how to choose the proper weather stripping for your front door, windows, and garage door.
For more on the ideal ductless garage heater and A/C read the full article.
3 Common Types of Weather Stripping
Compression Weather Stripping
This type of weather stripping is used to seal front doors. It consists of a molded strip made of wood, aluminum, or rigid vinyl with a flexible vinyl bulb along one side. As a general rule, compression weather stripping is the most durable. If you are installing compression weather stripping, you will need a hacksaw or scissors to cut the weather stripping to size and a hammer and nails to secure it.
V-Shape Weather Stripping

This type of weather-stripping is placed against the side of the door or window jamb to press against the edge of the door or sash and form a seal. V-shaped, it requires scissors for cutting vinyl or a hacksaw if it is made of bronze material. And if you’re installing bronze, which looks good on older homes, you’ll also need a hammer and nails to keep it from bending or wrinkling.
Foam Weather Stripping

This type of weather stripping is available in various sizes with an adhesive backing on one side. It attaches to the edge of a door or window stop or the bottom of a sliding window sash. Foam weather stripping is also easy to install because you only need scissors, but it only lasts one to three years. Once you’ve finished sealing everything, you’ll have a much more comfortable and energy-efficient home.
For more on tools that can measure indoor humidity read the full article.
How to Weatherstrip a Front Door
Sealing drafty front doors with weather stripping can reduce your annual energy costs and eliminate uncomfortable drafts in your home. Several types of front door weather stripping are just as effective but have slightly different applications. Among them:
Vinyl Bulb
One type of vinyl weather stripping comes with a plastic or aluminum screw in the track. The vinyl covers the gap between the door and the door jamb. Here’s how to install a vinyl bulb type of weather stripping in your front door.
- Measure the lath to the height of the door jamb.
- Next, cut it to size with tin snips or a hacksaw.
- The track is then fastened to the outside jambs against the edge of the front door.
- Pre-drill holes in the outer door jambs and screw the track in place, tight to the door.
Alternatively, some front door jambs have a fabricated groove for weather-stripping.
V-Shape
V-shaped weather stripping also comes with a tongue that is pressed into the grooves of the front door jambs. Here’s how to install V-shaped weather stripping in a front door with grooves in the door jambs.
- Measure the lath to the height of the door jambs.
- Cut it to size with scissors and press it into the grooves of the door jambs.
If you do not have a fabricated groove in the front door jambs, consider using adhesive-backed weather stripping; the installation process is the same. As I mentioned earlier, weather-stripping usually only lasts a few years, so check its condition each season and replace it if necessary.
Related Do doors expand in summer
For more on do doors expand in summer read the full article.
How to Weatherstrip a Window
As we already know, poorly sealed windows can let cold air into the home, reducing the indoor temperature and causing you to spend more on heating. That’s why sealing small air leaks can save up to 15% on your annual heating bill. To weatherstrip your windows, you will need the following tools and materials:
- V-flex weather-stripping: This is a thin strip of plastic with adhesive on one half bent into a V-shape to seal cracks.
- Foam weather seal, also known as foam rubber: Adheres to the underside of the window to make an airtight seal when windows are closed.
- Scissors: Use them to cut the weather-stripping and foam to the size of the window.
- Tape measure: To measure window dimensions.
- Half-inch finishing nails: To hold the weather-stripping in place.
- Hammer: To drive the nails.
Step 1: Clean the Window
Use warm, soapy water to clean the window jamb, which is the groove into which the bottom sash slides. The bottom sash is the part of the window that slides up and down when the window is opened or closed. Be sure to clean the bottom of the bottom sash because that is where the foam weather-stripping adheres to the bottom sash. You will also need to clean the back service at the top of the bottom sash.
Step 2: Install the Foam Seal
Start by measuring the width of the bottom sash and cut the sealing foam to size. The uncovered side of the foam is the sticky side, so be careful not to get it dirty as you measure and cut. Once you’ve cut a strip that fits your window, glue it firmly to the underside of the bottom sash. And when it’s in place, remove the backing paper.
Step 3: Install the V-Flex Weather Stripping on the Sides of the Window
First, measure the height of the lower sash and cut two pieces of V-flex weather stripping one inch longer than the sash’s height. The extra inch will ensure that your windows are completely sealed. When you have cut the two pieces to size, fold them down the center along the plastic groove to make a V-shape.
When ready, peel the paper off one side of the V to reveal the adhesive. With the window fully open, insert the weatherstrip between the lower sash and the jamb, inserting the extra inch into the gap, making sure the tip of the V points outward and the adhesive side of the V is against the jamb. Carefully glue the remainder of the strip to the jamb all the way down. Next, hammer finish nails through the weatherstrip to hold it in place. Be sure to hammer them all through so the nails don’t cause the sheet to stick when you slide it up and down.
Step 4: Install the V-Flex Weather Stripping on the Back of the Sash
For this last step, revisit the top of the sheet and cut another piece of weather stripping the width of the sheet. Fold it along the score line and make another V with the sheet raised about three to four inches. Remove the weatherstripping’s backing and glue it to the back of the top of the sash, with one point of the V pointing down, so the seal will compress when the windows are closed. And that’s it; you’ve successfully weather-stripped your windows, potentially saving hundreds of dollars in heating and cooling costs this year.
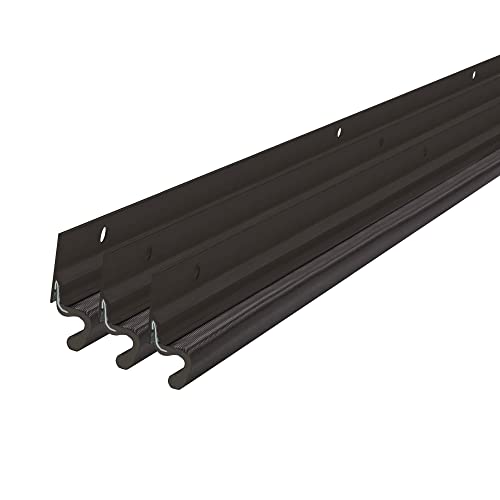
How to Weatherstrip a Garage Door: With ThermoTraks System
If light can be seen around the edges of your garage door, if it rattles in the wind, or if you encounter snow, rain, or pests inside your garage, consider using the ThermoTraks system to solve these problems. Here’s how it works.
You can eliminate these common garage door problems by replacing the existing vertical tracks with a custom-made ThermoTrak system. This effectively creates an airtight seal around the entire perimeter of your garage door, which can save energy, especially if you have a heater or air conditioner in your garage. The secret to the ThermoTraks system is the specialized, custom-made indentations in your garage door vertical track. As the garage door moves into its fully closed position, the patented track design moves the door into the heat seal. At the same time, it eliminates any air gaps and creates an airtight seal around the entire perimeter of the door.
For more on is lithium grease good for garage doors read the full article.
The airtight heat seal will keep out rain, snow, dirt, and unwanted bugs that sometimes enter your garage through the gaps that generally exist with a poorly sealed garage door. The Thermal Tracks sealing system is ideal for residential and commercial applications, reducing energy loss and saving money. In addition, infrared thermal technology confirms the effectiveness of the Thermal Tracks sealing system.
With the standard installation, the blue shadow of the infrared monitor indicates air infiltration around the edges of the door. In contrast, the Thermal Tracks door creates an airtight seal that drastically reduces air infiltration. Therefore, there is no sense in having an insulated garage door unless you can thermally seal it around its edges. The easy-to-install Thermal Track sealing system can be installed by DIYs, or you can contact your garage door professional to install the Thermal Tracks system.
Related Do dishwashers heat the water
For more on do dishwashers heat the water read the full article.
Related What is a 3-way dimmer switch
For more on what is a 3-way dimmer switch read the full article.