Let’s face it, having car battery problems can turn your productive day upside down. But with today’s technology, car batteries have improved significantly, but still, batteries don’t last forever. The two essential elements that start your car’s engine are a good battery and an alternator.
When you start the car, if you hear a rapid clicking noise or the headlights or dashboard lights dim, you probably have a weak battery. Now, suppose you only hear a single click when you turn the key, and the dash light goes out completely. In that case, you probably have a weak connection at the battery terminals, and it is not a weak battery.
Related Tools to fix dents in cars: Fix your car’s dents like a pro
For more on tools to fix dents in cars read the full article.
Four Examples to Get You Started in Testing Your Car Battery
(Below) let’s first go over the four examples of how you can test your car battery at home using one of the following tool options: Multimeter, 12v battery analyzer. (Most recommended), OBD2 engine scanner, and a hydrometer.
1. When Testing a Car Battery With a Multimeter
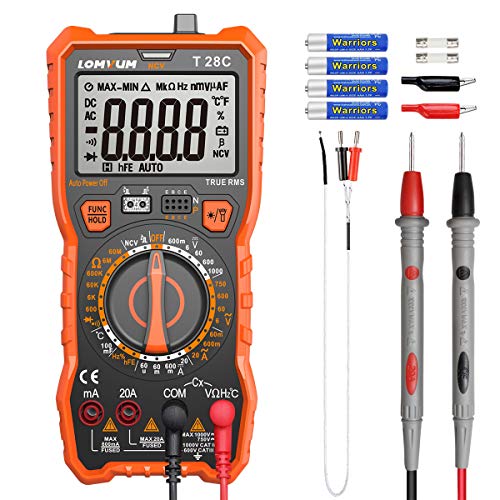
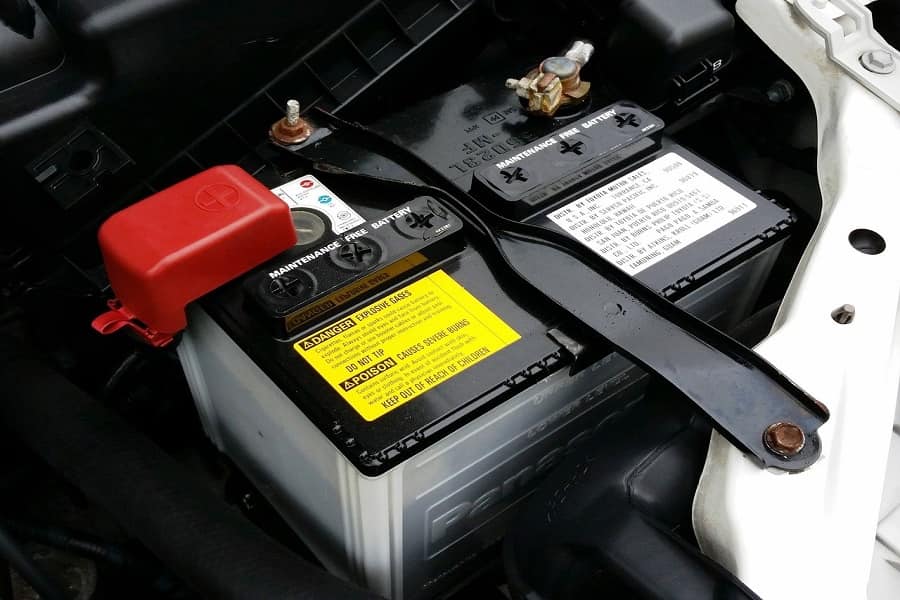
Set the multimeter to (20 volts DC). Connect or make contact with the multimeter’s red lead to the battery’s positive terminal. The multimeter’s black lead to the negative terminal of the battery. One of the easiest ways to tell which terminal is positive and negative is to look closely at the terminals; you will notice that the positive terminal is thicker than the negative.
Suppose the car battery has terminals on the side. In that case, you will have to find it by color, which means the red terminal cable is positive and the black terminal cable is negative. Now, if the multimeter reading is 12v or more, the battery is fully charged.
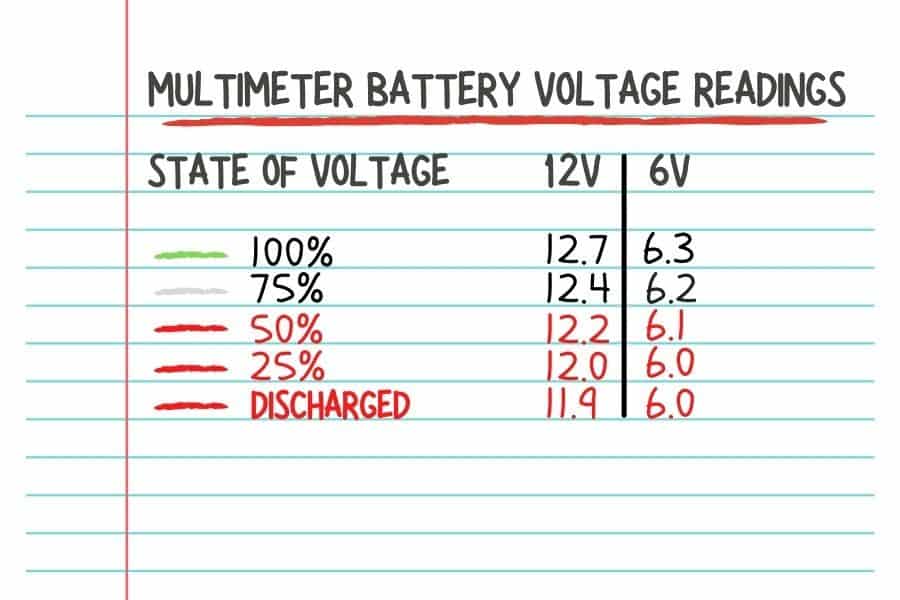
But if the multimeter reading is less than 12v, then the battery needs to be recharged. It is always suggested to have a car battery charger handy if you need to recharge the battery. You can also go to a nearby parts store to have your battery recharged, and they can also check if the battery holds a charge.
2. When Testing a Car Battery With a 12v Analyzer

First, look on the top of the battery, you will see a sticker/label, and you need to find the cold cranking amps (CCA) rate; you may see something like this (CCA 430). Cold-cranking amps range from 400 to 750. Connect the red cable clamp on the analyzer to the battery’s positive terminal and the black cable clamp to the battery’s negative terminal. Set the analyzer to the CCA number that your car battery is rated to in the sense that if the label shows (CCA 430), then put your analyzer to 430 and press enter.
After pressing enter, you will see the results displaying volts, measured, and rated. Still, the substantial number you need to take a closer look at is the measured CCA result. Suppose the measured CCA result is less than the current battery rate number in this example (CCA 430). In that case, anything less than 430 is bad, and you will need a new car battery even if the analyzer voltage is at 12v. Using a car battery analyzer is one of the easiest ways to test your battery.
3. When Testing a Car Battery With a Hydrometer
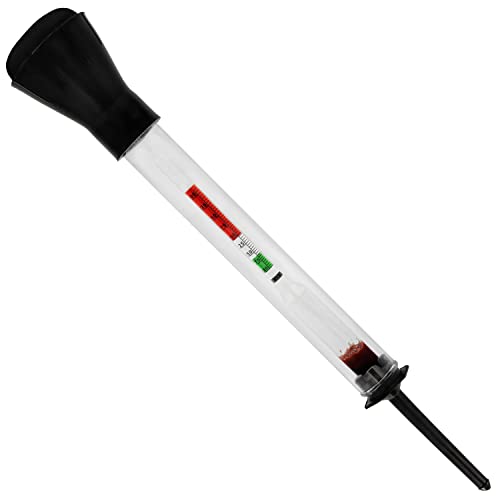
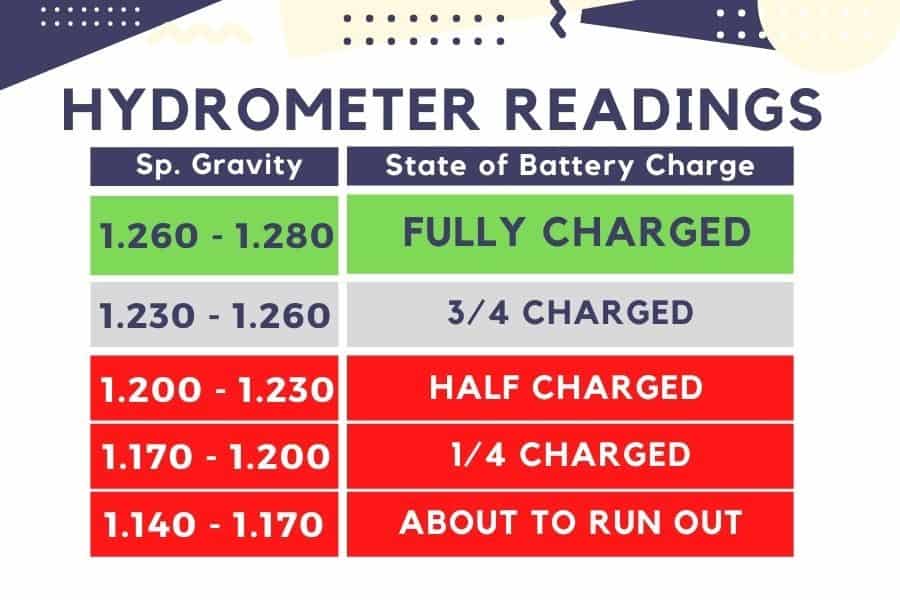
A hydrometer measures the specific gravity inside the battery by drawing the liquid from the battery and measuring the electrolyte’s density. With this option, there are no cables involved. If your battery can be serviced, which means having access to the battery cells to measure the liquid, then a hydrometer is recommended. Some car batteries are completely sealed, which means they are maintenance-free. Batteries have six-cell compartments, and you will have to check them one by one. Be sure to wear safety goggles and safety gloves.
If your battery has access to these cells, remove all cell caps first. Insert the hydrometer into the battery cell and extract the liquid to perform the density measurement process. These are the five measurement indices you should follow to determine if your battery is charged when using a hydrometer:
4. When Testing a Car Battery With an OBD2 Scanner
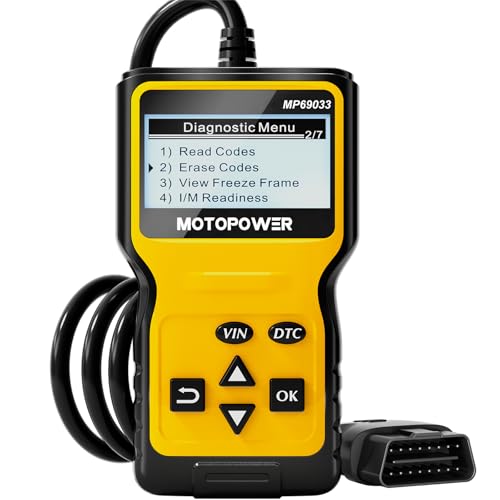
Plug the OBD2 scanner into the port; usually, this port is located under the steering wheel area. Turn the key to the on position, and on your OBD2 scanner, find and select the Control Module Voltage option. Next, turn on your car’s engine; at this point, you will see the voltage reading displayed on the OBD2 scanner. As mentioned above, anything less than 12v is not a good result.
Learn How to Test a Car Battery Terminal (Helpful guide)
It is essential to keep the car battery terminals clean of corrosion to avoid engine starting problems. Even if you don’t see corrosion on the battery terminals, it doesn’t mean they are clean. A loose or faulty terminal can also cause engine starting problems in your car. To test the battery cable terminals first, you will need a test light. As you can see in the image (below), this test light has a ground wire and an inner light that turns on and off on contact; it is straightforward to use with a digital display. If you already have a multimeter, you do not need the test light.
1. Test a Car Battery Terminal With a Multimeter
With your car engine off, adjust your multimeter on the continuity symbol; the symbol looks like the signal bars on a cell phone. Place the red multimeter lead on the top of the battery post. Make contact with the black lead of the multimeter to the battery cable terminal. You will hear a continuous beep on a multimeter, i.e., a constant beep is a good signal when checking a battery terminal. No beep is a bad contact, which means you may need to clean or replace the cable terminal.
2. Test a Car Battery Terminal With a Test Light

With the car engine off, clamp the continuity tester wire to a good ground; it could be any clean bolt or metal in your car. Place the tester to the battery positive on the battery post’s top flat surface; you will see the tester light will come on. Next, make contact with the same terminal of the positive battery cable. If the light does not come on, then the cable terminal is faulty or loose or needs to be cleaned or replaced.
Perform the same steps to check the negative battery cable terminal. When having issues with terminals, It is usually recommended to replace them. Note: when you remove the battery terminals, the car will lose the memory settings. In other words, things like the stereo, and memory seats are going to reset. If you decide to clean the battery post and cable terminals, you will need a battery terminal cleaning kit. (See image below)

You will need to remove both terminals and clean them. After you have cleaned and reinstalled both terminals, repeat the same testing process to ensure that the cable terminals make good contact with the battery post. If both terminals pass the test, then apply terminal grease around both terminals. The grease will keep the terminals free of corrosion, making them more efficient every time you start your car.
Testing a Car Alternator With a Multimeter (Simple process)
Set your multimeter to (20 volts DC). With the car engine off, place the multimeter’s red lead on the battery’s positive terminal. Make contact with the black lead of the multimeter on the negative terminal of the battery. Inspect the terminals for corrosion so that you can get a clear reading when testing the alternator. After connecting your multimeter, you should see a reading around 12.65v (with the engine off). Now, to see if the alternator is OK, start the car.
After starting your car, you will see that the multimeter is going to read around 14.30v. Suppose you see that the multimeter is reading more than 14.70v. In that case, the alternator is overcharging the battery and can damage the battery. And if the multimeter reads less than 14v (with the engine running), it means the alternator is not holding a charge on the battery. Remember, this example test is only with the engine running. Suppose you add some accessories to it like turning on headlights, AC, stereo, and cell phone charging, to name a few. In that case, this can affect the performance of your car when you have a faulty alternator.
What to Consider Before Replacing a Car Alternator
As I mentioned above, corrosion in the battery terminals will create problems for your car’s performance. Apply the same steps mentioned above; perform a process of elimination. Clean and test the battery terminals to ensure good contact. A faulty battery terminal can cause the alternator not to hold a reasonable charge to the battery.
Another place to check is the alternator’s back to ensure all wires are plugged in and secure. Also, on the back of the alternator, check for melted wires. Check the engine belt, make sure it is tied, or if it needs to be replaced. An old engine belt can also cause the alternator not to perform correctly.