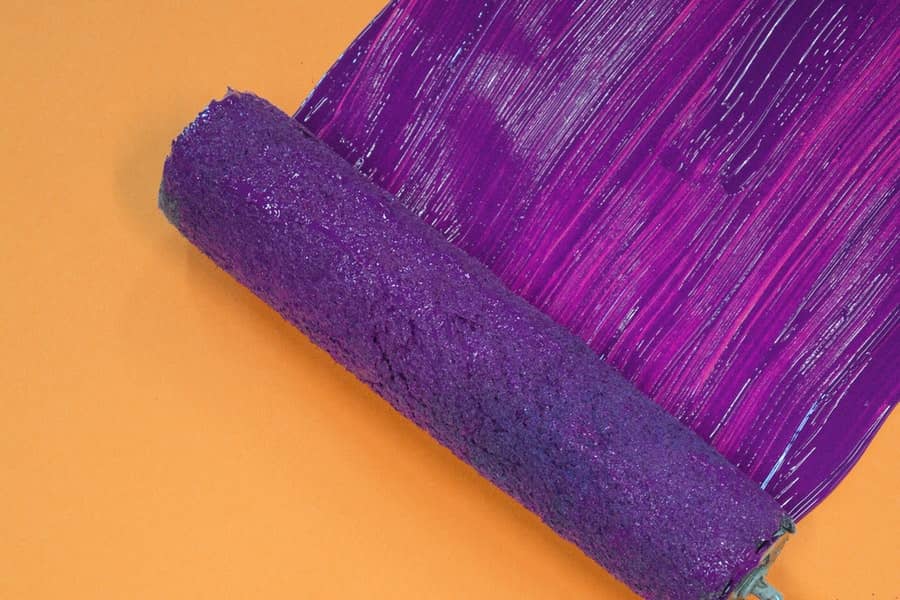
No, it is not recommended to dry paint rollers in the dryer because paint rollers are made of plastic and cardboard cores.
You might potentially be asking yourself, how can I dry a paint roller quickly? We all know that cleaning and drying paint rollers can be a challenge. After researching, I found this short useful video demonstration of the easy way to clean and dry paint rollers. In this (2:33 minute video), you will see the surprising results of how fast and straightforward it is to clean and dry your paint rollers.
Remember that plastic and or cardboard materials are not supposed to be in the dryer. That said, if the paint rollers are placed in the dryer, it can end up damaging the rollers or, even worse, your dryer. (Below) you can see two great alternative tools to clean and dry your paint rollers the easy way.
Two Alternative Tools (To clean & dry paint roller)
1. Drill Attachment Tool
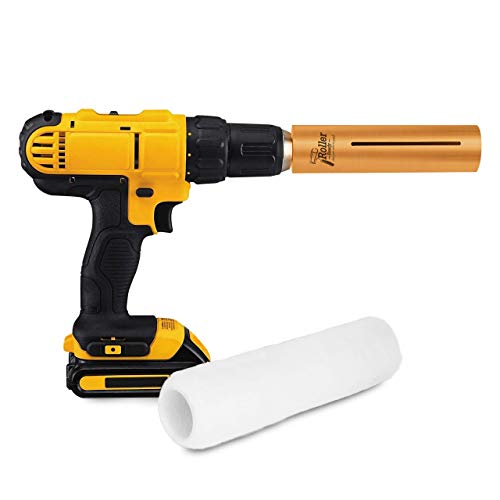
The trick to drying paint rollers is to spin them at high speed, i.e., the higher the spinning speed, the better the paint roller will dry. This drill attachment tool relies on the revolutions of the drill to spin the roller. For this method, you will need a drill and two empty 5-gallon buckets for best results. Use one bucket with clean water, and the other leave it empty to dry the roller and avoid any splashing. Here’s how it works:
| Step | Action |
|---|---|
| 1 | Connect the attachment tool to the drill and insert the roller. |
| 2 | Put the roller into the bucket with clean water. |
| 3 | Start the cleaning process. |
| 4 | After completing the cleaning process, put the roller into the empty bucket to start the drying process. |
| 5 | Spin the roller as needed. |
2. Hand Spinner Tool
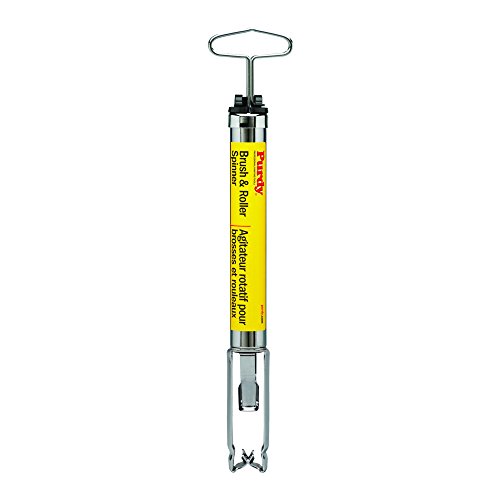
With this method, you will have to spin the tool by hand for it to work correctly. Remember that the faster you spin, the better the roller will dry. You will also need two empty 5-gallon buckets, one with clean water and the second bucket left empty for the drying process. Here’s how it works:
| Step | Action |
|---|---|
| 1 | Insert the roller into the spinner tool. |
| 2 | Put the roller into the bucket with clean water. |
| 3 | Start the cleaning process by spinning the tool. |
| 4 | After completing the cleaning, put the roller into the empty bucket to start the drying process. |
| 5 | Spin the roller as needed. |
For more on The ultimate guide of drywall do’s and don’ts read the full article.
When Cleaning Oil Base Paint From Rollers!!
For oil-based paints, clean with the recommended solvents always follow the manufacturer’s safety recommendations when using solvents. And, of course, never pour the unused paint into a drain or sewer. Consider your local recycling agency for more information on proper disposal guidelines.
Can You Use The Same Roller for Primer and Paint?
When applying the primer, it is not recommended to use the same roller. Always remember that the primer is not the last coat of paint, regardless of whether you are trying to paint cabinets, walls, etc.
An excellent rule of thumb is always keeping a paint roller for each application, meaning assigning a paint roller for primer, oil, flat, and semi-gloss paint. Each paint is different, which is why you will need separate paint rollers to obtain better results.
How to Choose The Right Paint Roller!!
I learned that different applications and paints require more than just a brush; you need the right roller for larger jobs. I will help you determine the right paint roller for you and your specific working conditions. The paint roller you should use will depend on several factors, as indicated below:
- The type of paint you are using.
- The surface you are painting.
- Environmental factors, such as temperature and humidity.
All of which can influence the quality of your work’s finish. Typically Paint rollers are used for extensive interior and exterior spaces after cutting.
Most Common Paint Roller Fabrics
The most common paint roller fabrics include:
- Fabrics.
- Foam.
- Microfiber.
- Polyester.
- Lamb wool.
- And a mixture of various materials.
Each is designed to provide the best possible finish on a variety of surfaces. Not using the right roller will ruin your paint project.
Which Paint Roller Should You Use?
Use the following recommendation about which paint roller you should use for each application in the following way:
- It would help if you used a shorter nap roller for a smoother finish in the interior walls.
- If you are painting with enamel paint, the fabric rollers are what you would use.
- If you are using an oil or water-based flat paint, use a knit roller.
- For exterior or interior works with a rougher surface, such as bricks or cement blocks, use a roller with a more significant nap, which provides a better pick up and release of the paint to cover irregular surfaces more efficiently.
Remember that, as I said earlier, there is a roller suitable for practically all paints and surfaces.
What Paint Roller Size Should You Use?
Now that you know the main factors about paint rollers, the last thing you need to do is get the right size of roller to start and finish your project like a professional. Here’s a list of the most common different sizes of rollers you will need depending on the applications you intend to apply, as follows:
- 18-inch roller: Ideal for fast painting ceiling and walls. (Typically used by professionals)
- 9-inch roller: Ideal for walls and wide surfaces.
- 7-inch roller: Same as 9, Ideal for walls and wide surfaces.
- 4-inch roller: Ideal for cabinets and doors.
- 3-inch roller: Ideal for trims and or narrow surfaces.
Best Practices When Using Paint Rollers!!
It’s incredible how the right tools and some genius practices can make any painting job more comfortable, faster, and more successful. Many jobs will include a combination of spray application, brush, and roller application. Regardless of the type of work, there are a few acceptable practices to follow.
When Using a New Paint Roller
For best performance when using a new paint roller, use a strip of adhesive tape and passed across the surface of the new roller to remove loose fibers. Otherwise, those fibers can come off the roller and ruin your hard work.
When Ready to Start Painting
When you are ready, pour some paint into the roller tray and move it from one side to another a few times until it is evenly covered. Then draw it over the edges of the tray to remove the excess paint. Working in 2-foot sections, make an N-pattern and across the roll to apply the paint. Complete each section with light roller strokes at right angles to the cross roller.
Maintain light pressure for uniform coverage across the surface to provide a smooth, attractive finish that also meets the coating’s recommended film thickness. The thickness of the thousandth is a measure of the paint film’s thickness when applied to the wall. It is important because the paint is formulated to work better with a specific thickness.
If too much paint is applied, the coating can fall off. The too little coating will result in poor skin or insufficient defense against moisture or UV rays. The coating manufacturer can express the required thickness as wet or dry film thickness attributed to the thickness previously or after the paint dries.
A few gauges are used to measure millimeter thickness; the standard tool has notches spaced in 1-millimeter increments. Keep the gauge at a 90-degree angle to the top and press firmly, making sure both sides make contact with the substrate. The number above the last visible notch illustrates the thickness of the coating in thousandths of an inch.
If you measure the wet film thickness, there will be a trace of paint on the gauge. Be sure to clean the gauge as soon as you are finished to be accurate the next time you take a reading.
Best Weather Temperature for Painting Inside and Outside!!
Whether you are painting inside or outside, temperature matters, and always follow the manufacturer’s recommended temperature.
- Inside: it is recommended to paint at no lower than 40 degrees Fahrenheit and about 72 degrees Fahrenheit on the high side. The room temperature is ideal. Placing a heat source will ensure that the paint dries to the desired color and finish.
- Outside: it would be best if you painted when the humidity is low and the temperature is between 70 and 85 degrees Fahrenheit. When the humidity is high, the water-based paints take longer to dry. On sunny days, try to follow the shade, so the wet paint is not exposed to direct sunlight. That can cause the paint to blister.
And as in interior painting, it is better to start at the top and work downwards, always keeping a wet edge. If you paint in an area where the paint is already dry, the film could bend or peel later. Follow these practices, and you’ll have an excellent paint job that is efficient, great looking, and offers long-lasting performance.
Related
Read the full article about leaving a paint sprayer overnight, is it a good idea?