Using a reciprocating saw with a grout grabber blade has been proven to be one of the best, fastest, and easiest ways to remove grout.


This grout grabber blade is unique because you can add multiple blades depending on the grout line’s width. Here is a list of the grout grabber blades you will need depending on the width of the grout line: One blade for 1/8 grout line, two blades for 1/4 grout line, three blades for 3/8 grout line, and four blades for 1/2 grout line. A corded reciprocating saw is ideal for large areas to remove grout; however, you can also use a battery-operated saw for small areas.
Related: Tools for cutting plexiglass
Do You Need to Remove All Grout Before Re-Grouting?
I recommend that all grout be removed for best results, as you do not want to mix old grout with new grout. Keep in mind that over the years, the grout attracts algae and moisture and can stain. When the grout has dried, it forms a hard, dense material, so you will have to work vigorously to remove it. Fortunately, some tools can make the job easier. The best option is to use the method mentioned above, a Sawzall with a grout grabber blade or a grout remover, also known as a grout rake. A grout rake can fit into the tile joints and break up the grout, but it will take more labor to remove the grout when using a rake.
Make sure to wear safety goggles before you start removing grout because dust can fly everywhere. Open windows to allow air circulation because the dust will be in the air; if you can’t do this, use a breathing mask. Cover the area where the dust sheets will make cleanup much more effortless. When working over a bathtub or sink, cover the drain to prevent the grout from going down the drain.
To remove the grout, add some pressure and move the tool to cut the blade’s teeth into the lines. Using a grout rake is simple but is quite laborious. Suppose you have a large area to cover. In that case, you can use an electric grout remover such as the Sawzall with a grout grabber blade option mentioned above. Again, using a Sawzall is much less laborious and is ideal for large areas.
Can You Put New Grout Over Old Grout?
The two main reasons why new grout should never go on top of old grout are inadequate grout adhesion and poor aesthetic results. As I mentioned earlier, you must altogether remove all old grout; this is the only way to achieve proper bonding. If you put new grout in old grout, it will also create discoloration areas.
How Hard is it to Remove Grout?
It is a straightforward task if you have the right tool; for example, using a Sawzall can significantly speed up the grout removal process. Here is a simple trick, to reduce the risk of tile damage, it is best to start in the tile center rather than the corner. Avoid scratching the tiles or damaging the tile edges as you work your way down the line. When removing grout from any wall, do the vertical joints first, and then start working on the horizontal joints to make sure you don’t miss any grout. Remove grout up to the thickness of the tile. Once you have removed the grout, wipe the entire surface with a damp cloth to remove any remaining fragments.
When Applying Grout
Some grouts are waterproof and suitable for wet areas such as showers. Other grouts are only suitable for dry areas, and some have anti-mildew properties. Grout also comes in various colors, so choose the type and color most suitable for your job. If using powder, make a creamy paste, mix only the amount you are likely to use in 30 minutes, as it will start to dry after that time. When mixing the grout, be careful not to overmix it, as it could create air bubbles.
To apply the grout, you will need to use a float or spreader tool. If you have a broad area to grout, a grout float is the best choice. A grout spreader is ideal to use for smaller areas. To grout, use a flat scraper or a mud mixer to place some grout on the grout spreader. Then use the spreader to apply the grout into the joints and use the spreader’s edge to wipe the tiles’ surface as you go. Continue in this manner until all joints are covered. Work at a steady pace because the grout will begin to harden after about 20 to 30 minutes. Once you set the grout, wipe off any excess with a non-saturated tile sponge.
If you accidentally remove grout while cleaning, you can use the spreader or your finger to add more. Allow the grout to begin to harden for about 20 to 30 minutes, then use the grout finishing tool to smooth the joints and give them a clean appearance. Run the rounded end of the grout finishing tool across the joints in a continuous, even motion. As the grout dries, a dust film will appear on the tiles. After a few hours, when the grout joints are dry, use a soft, clean cloth to polish the dust film, which will leave the tiles shiny.
Can You Leave Grout Haze Overnight?
Yes, however, you should clean the grout haze in the first ten days after the grouting process. Still, you probably don’t want to wait that long, as it might be a little more challenging to remove the haze and film from the tile.
How Do You Remove Grout Haze?
Let’s review the proper ways to remove grout haze on the tile surface after installation. (Below) you will understand the causes of grout haze and the proper steps to remove it.
Haze is the result of improper cleaning during the grout installation process. This haze is a film that settles on the surface of the tile. Also, this haze may appear as a glossy or opaque film. What has occurred is that a thin film of the product’s urethane binder has been left on the tile surface during the grouting process. Due to the fast-curing nature of grouts, this thin film dries very quickly.
If cleaning instructions are not followed, it can remain on the tile as a haze or film the next day. Now that we understand the causes of grout haze let’s look (below) at the steps necessary to eliminate it before using any grout haze remover.
Remove Grout Haze Naturally
Grout haze can appear in varying degrees depending on how you cleaned the grout during installation. First, look at lighter cleaning options and move on to more aggressive options that you can use if the haze is challenging to remove. For example, using a white scouring pad, such as a (magic eraser), dip the pad in water, wring it out, and lightly scrub the tile surface.
If the grout haze is light, this step will obliterate the grout haze. If there is still grout haze, you can try using an alcohol-based glass cleaner, such as Windex. Spray the glass cleaner on a white scouring pad and gently scrub the surface of the tile. Allow the solution to rest on the surface for two to three minutes. Then scrub the area again with water and a clean white scouring pad and wipe the surface with a dry towel or cloth.
If the above steps have not removed the haze, a more aggressive cleaning will be necessary. And for this, I recommend using the following two products to remove the haze from the grout as follows: AquaMix Grout Haze Remover, and FILA Grout Haze Remover.
1. When Using AguaMix Grout Haze Remover
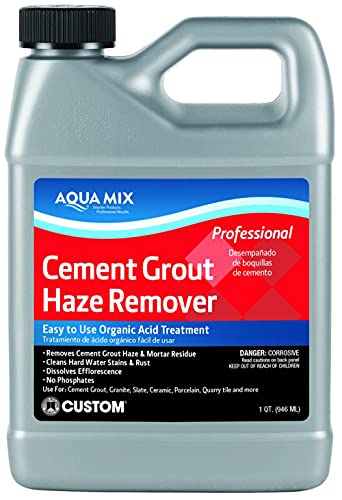
After grouting, you will see residue left behind after the use of rinse water. One proactive measure you can take to avoid grout haze is to pre-seal your stone or tile before grouting. AquaMix offers several types of sealers and enhancers that are good to protect against staining and damage. When using them as a pre-sealer, be sure to allow an adequate cure time of 24 to 48 hours before grouting.
Another measure to prevent a grout film from forming is to add AquaMix grout spot cleaner with the last bucket of rinse water. The grout stain cleaner is a concentrated product, so only three ounces of product per gallon of water will help remove and prevent the grout film. In many cases, water alone cannot remove. However, if you still have a haze and it has been less than ten days since grouting, you can always remove it safely and with minimal effort.
Instead of using grout cleaner diluted with water, use it directly on the surface. Apply non-diluted grout cleaner to the affected area and use a circular motion with a white nylon scouring pad to remove the residue. Dry thoroughly with a microfiber towel, and the result will be a squeaky clean surface. For tougher areas with heavier residue, allow the product to dwell for 5 to 10 minutes before scrubbing.
For commercial jobs, you can use grout cleaners with standard machines to easily remove grout from large areas. Note: be sure to avoid using the grout cleaner on calcium-based polished stone, such as marble or limestone, as it can dull the polished stone’s surface. For marble or limestone, using AquaMixes Nano-Scrub grout haze remover is recommended to clean the surface safely.
2. When Using FILA Grout Haze Remover
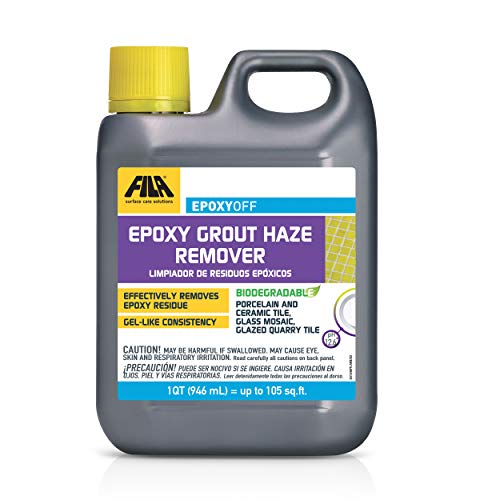
FILA is a urethane grout and urethane haze remover that will allow the urethane binder to release from the face of the tile. Spray on a 3M white Doodlebug pad and then rub lightly over the urethane haze. Allow the solution to settle or remain on the surface for a minute or two. Re-scrub lightly and rinse thoroughly with clean water. Complete by drying the surface with a clean towel or cloth. Excessive or challenging to remove haze may require repeated treatments or longer dwell time.
Related Vinyl plank flooring made simple: What you need to know
For more on vinyl plank flooring read the full article.